Summary
Bitwise Account Manager(BAM) is an open source Chrome extension that digitally signs API requests for Bitwise Terminal. BAM encrypts API credentials on disk using industry standards (AES and PBKDF2) and safeguards them in memory so that they are never exposed to third parties including Bitwise Terminal.

Bitwise Account Manager main menu
Installation
- (Optional but recommended) Create a dedicated Chrome profile for BAM.
- In Chrome, open the People menu and choose Add Person.
- An isolated Chrome profile ensures that no other extension will interfere with BAM or pose a threat to the security of API trading. It also gives you peace of mind that BAM never meddles with other websites.
- Install Bitwise Account Manager from Chrome Web Store.
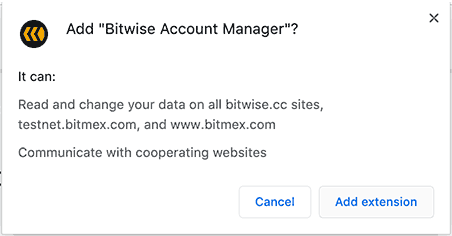
Chrome extension confirmation
- The wording of Chrome’s confirmation message might sound confusing or even alarming, but BAM does not need to read or change data on testnet.bitmex.com or www.bitmex.com per se; it only declares these two domains in the permissions specification in order to submit API requests to BitMEX from mux.js.
- Open Bitwise Terminal to confirm that it successfully connects to BAM.
- Click the BAM icon at the top right. Add trading APIs in the pop-up.
- (Optional but recommended) In BAM, click Encrypt Data.
- BAM uses your password to encrypt API credentials on disk.
- If you forget the password, there is no way to recover it. You’ll have to reinstall BAM and re-enter API accounts.
Advanced installation
For those who want to audit or tinker with the source dfn of BAM, replace step 2 above with the following steps.
2-1. Clone the git repository from a terminal.
git clone https://github.com/bitwisecc/bam2-2. In Chrome, open chrome://extensions/ and turn on Developer mode.
2-3. Click Load unpacked and open the local BAM directory.
2-4. (Optional) Edit the source code as you like and reload the extension.
Do not load both your cloned repository and the published extension at the same time.
How BAM works
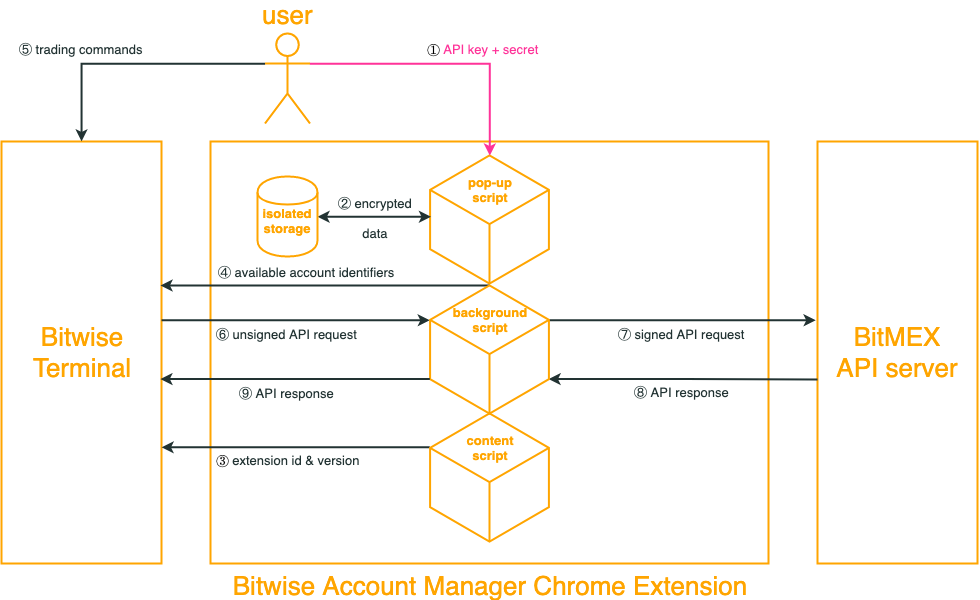
System architecture overview and data flow diagram
The diagram above depicts how data flows between system components.
On any *.bitwise.cc webpage, BAM can be activated by its icon in Chrome. In the pop-up window, you may add, rename, or delete API keys (see ① in the diagram).
As Chrome isolates BAM’s window and storage space from all websites and other extensions, sensitive API data do not leak. For added security, BAM derives an AES key from a user-supplied password and encrypts account data on disk (②).
When (and only when) you visit a page on *.bitwise.cc (e.g. Bitwise Terminal), BAM injects its extension ID and version number into the host page so that the two sides can communicate with each other (③).
Once a message channel is established, the host page gets a read-only view of the account list (names and API identifiers) but not any API secrets (④), without which no valid request signatures can be forged.
When you issue a command (e.g. submitting a limit order) in Bitwise Terminal (⑤), the host page delegates the API request to BAM (⑥) as Bitwise Terminal itself is incapable of signing the request.
Having signed the API request, BAM submits it directly to BitMEX (⑦). Upon receiving a server response from BitMEX (⑧), BAM forwards it to Bitwise Terminal (⑨) to complete the execution of your command.
During the entire session, API secrets never leave the realm of BAM.
User manual
Adding accounts
Create a pair of API key and secret at https://www.bitmex.com/app/apiKeys (or https://testnet.bitmex.com/app/apiKeys if you’re using testnet). The default key permission grants read-only access to API keys. Change it to “Order” if you plan to run trading commands.
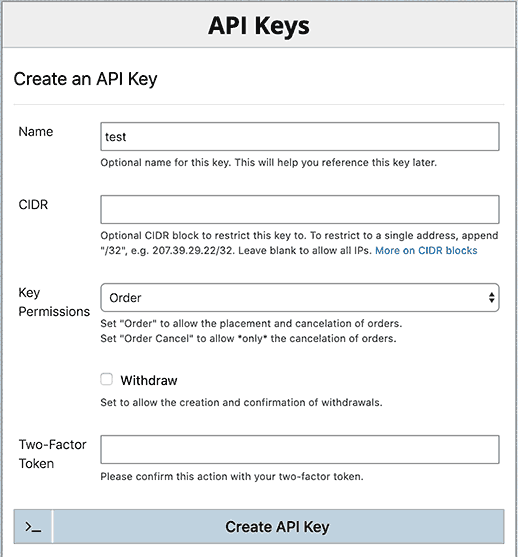
BitMEX API key management
Switch to Bitwise Terminal. Click the BAM icon to open the pop-up window. Click [ADD ACCOUNT]. Pick either bitmex or bitmex-testnet. Give the new account a name without whitespaces. Paste in the API key and secret and click [OK].
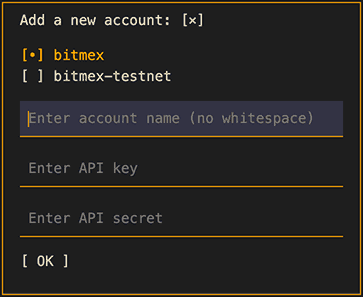
Add account to BAM
Note that when you switch between browser tabs, Chrome would close an extension’s pop-up window. You’ll need to click the BAM icon again to bring it back.
Renaming an account
Click the account name in the list to rename it.
Deleting an account
Click the [x] button next to an account to delete it.
Encrypting data
Encryption is optional but recommended for enhanced security. In BAM’s pop-up, click [ENCRYPT DATA]. Type a password twice and click [OK].
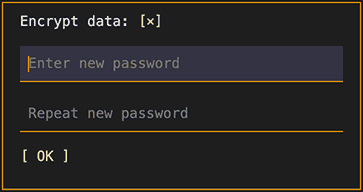
Encrypt data in BAM
When BAM starts next time or you click [LOCK DATA], you’ll be prompted for the password to unlock data.
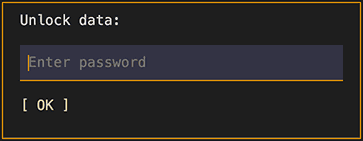
Unlock data in BAM
If you forget the password, there’s no way to recover it. You’ll have to reinstall BAM and re-populate API accounts.
Exporting data
To make a data backup, click [EXPORT DATA]. It’s recommended that you encrypt the data first.
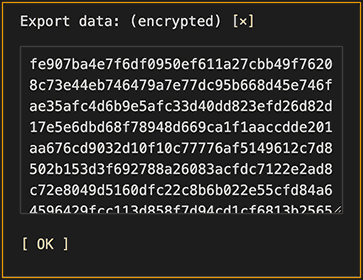
Export data from BAM
Importing data
To restore from a backup, click [IMPORT DATA]. Paste in the encoded data. If encrypted, also enter the password. Click [OK] to confirm. Be cautious that this will overwrite your current account data.
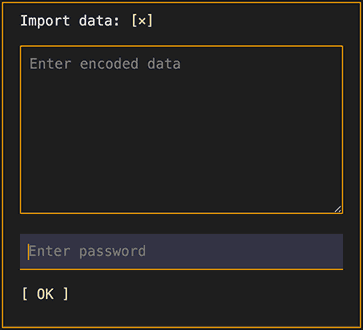
Import data into BAM
License and code contribution
BAM’s full source code is released under the permissive MIT license.
For better security and performance, this extension has no external dependencies.
Bug reports or fixes are always welcome on Github. However, please refrain from sending pull requests with substantial changes or new dependencies unless they are security enhancements. We’d like to keep the repository lean to facilitate code auditing and modifications.